Project Story
Retaining Wall Installation — Plymouth, MA
A sloped backyard that needed structural support, better drainage, and usable outdoor space.
The Situation
The homeowner had a backyard with a significant slope running from the house toward the back property line. After heavy rain, water would pool against the foundation and saturate the lower yard, making it muddy and unusable for half the season. The existing grade was too steep for a patio, and the soil — typical Plymouth glacial sand — was shifting enough that a garden bed along the slope kept washing out.
They wanted three things: stop the water from reaching the foundation, create a level area for a future patio, and make the yard look finished rather than wild.
Our Approach
After assessing the slope, soil conditions, and drainage patterns during an on-site visit, we designed a segmental block retaining wall that would hold back the upper grade and create a level terrace on the lower section. The key decisions:
- Wall height: approximately 3 feet — enough to create a usable level area without requiring engineered drawings (walls over 4 feet in Plymouth require a structural engineer and building permit)
- Base depth: 8 inches of compacted processed gravel, set 6 inches below finished grade. Plymouth's sandy soil drains well but shifts easily, so over-building the base was essential
- Drainage: perforated drain pipe behind the wall with crushed stone backfill and filter fabric to prevent fines from clogging the system. This is what keeps the wall from failing after a few years of freeze-thaw cycles
- Block system: interlocking segmental blocks with a setback profile — each course steps back slightly, adding structural stability through gravity rather than relying on mortar
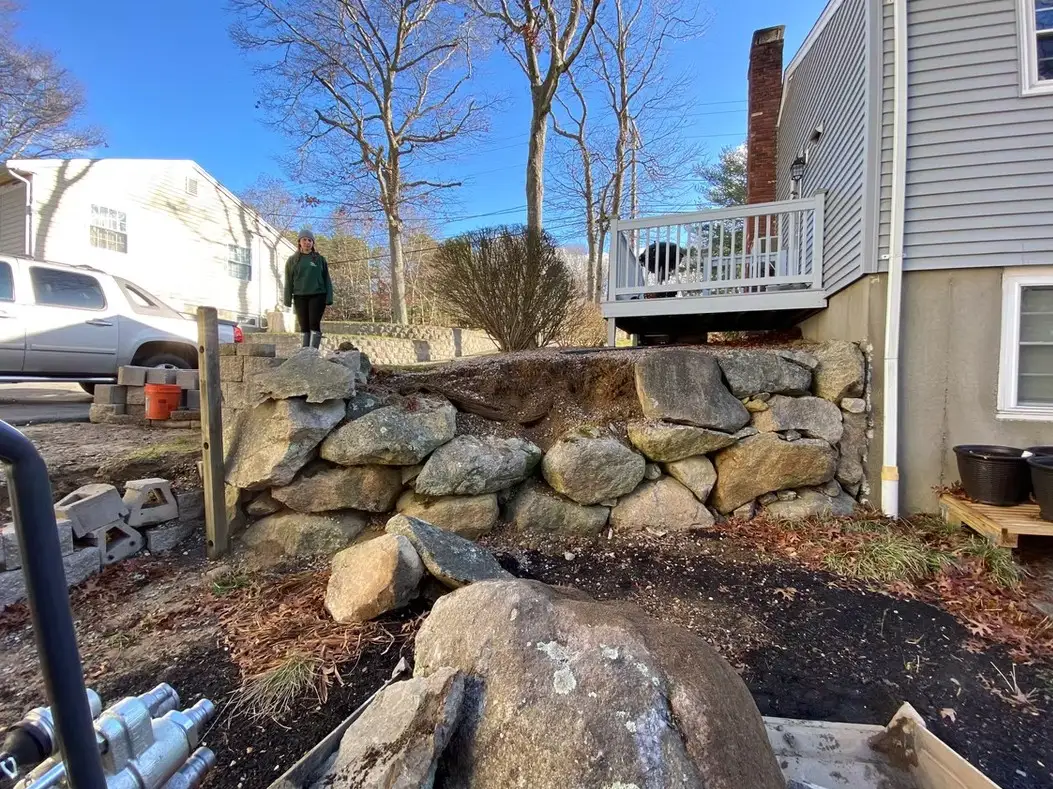
The slope before construction — saturated soil, uneven grade, no usable space below the drop.
The Build
The project took five working days from excavation to final grading. Here's what each phase involved:
Day 1-2: Excavation and base. We excavated the slope to create the wall trench and set the compacted gravel base. This is the most important step — if the base isn't level and compacted properly, the wall shifts within a year. We used a plate compactor in 2-inch lifts to get full compaction.
Day 3-4: Wall construction. Blocks were laid course by course with interlocking pins. The drain pipe and crushed stone backfill went in as the wall went up — you can't add drainage retroactively. Each course was checked for level and alignment.
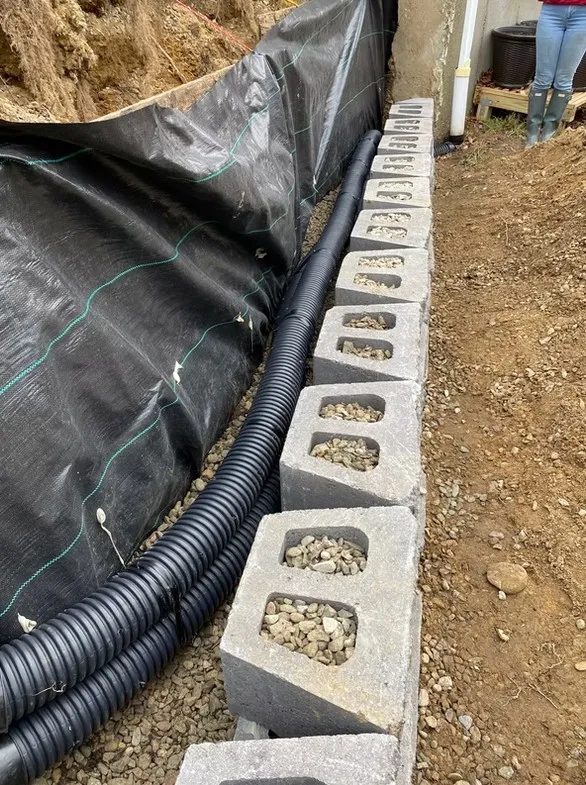
Drainage pipe and crushed stone backfill installed behind the wall during construction.
Day 5: Cap, grading, and cleanup. The cap course was glued with construction adhesive for a finished look. The terrace behind the wall was backfilled and graded for the future patio, and the entire site was cleaned up.
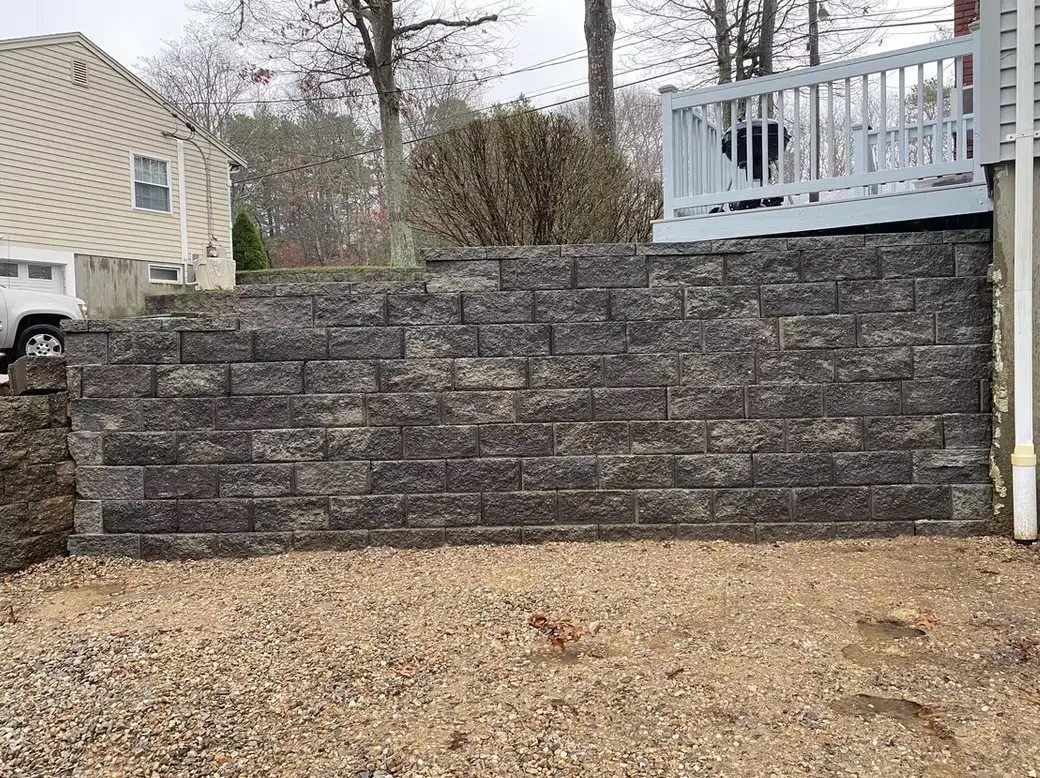
The Result
The homeowner now has a level terrace where the slope used to be — enough room for a full patio and outdoor dining area. Water drains behind the wall through the drainage system instead of pooling against the foundation. The wall itself is clean, level, and built to last through decades of New England weather.

Project Details
| Detail | Specification |
|---|---|
| Location | Plymouth, MA |
| Wall type | Segmental block, interlocking |
| Approximate height | 3 feet |
| Base depth | 8 inches compacted gravel |
| Drainage | Perforated pipe + crushed stone backfill |
| Timeline | 5 working days |
Considering a Retaining Wall?
Every property is different — slope, soil, drainage, and access all affect the approach and cost. If you're dealing with a sloped yard, drainage issues, or erosion, a retaining wall might be the right solution. You can get a rough estimate or request a free on-site quote to discuss your specific situation.